

Google Tag Manager is a code snippet that enables sending data to Google and numerous other 3rd parties. If you’re not using Google Tag Manager or a similar tag management tool, you need to directly upload changes on your website or mobile application. With Google Tag Manager, there’s no need to keep third-party code snippets within your source files. Instead, you can determine when and which tag should be triggered through Google Tag Manager.
It’s also worth mentioning that Google Tag Manager is considered one of the most essential services due to the ease of use it provides and its adaptability to evolving technology.
For web usage, Tag Manager operates with its tag management system. A tag is placed across all pages on your internet address. In mobile applications, it’s loaded through the Firebase SDK for Android and iOS systems. The container takes over the role of all tags on your internet address or mobile application, including Google AdWords, Google Analytics, and third-party tags, which are manually coded and supported. Once Tag Manager is installed on your internet address or mobile app, you can update all tags, make changes, or add new ones through the web interface application.
This requires creating a tag for the action you want to track or measure initially. GTM provides you with special codes for many channels, such as:
For codes not listed here, you can easily apply the ones you want via the custom HTML tab on GTM. After adding the code, the next step is to create a Trigger for measuring the actions taken. It’s important to define the action you want to measure in the trigger section.
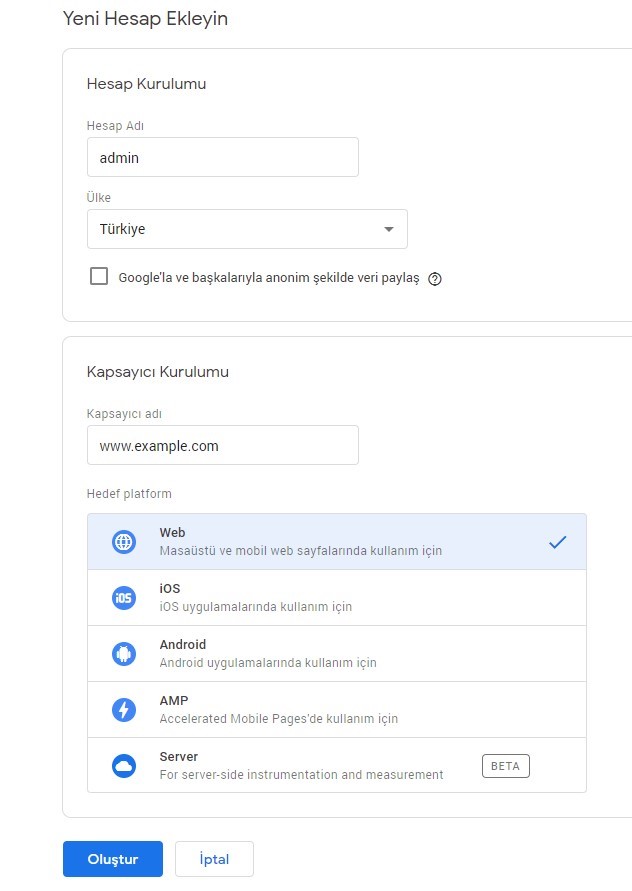
A Tag Manager account allows you to work on tags for one or multiple internet addresses or mobile applications with just one Google account. Generally, it’s sufficient to create only one Tag Manager account per company or organization.
How to Install Google Tag Manager?
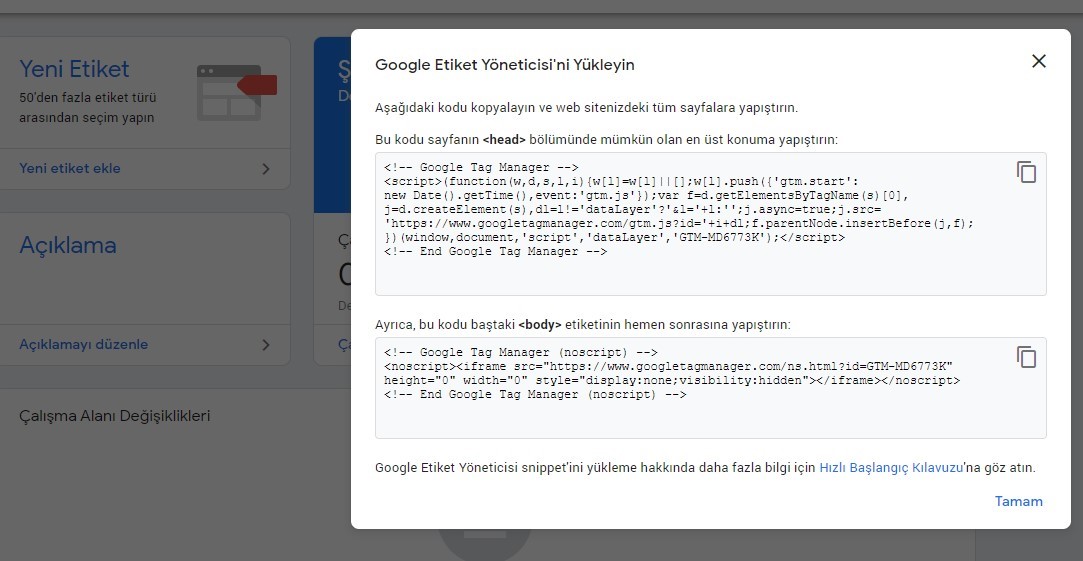
Generally, Google Tag Manager installation is straightforward. The Tag Manager becomes active through the addition of two different codes to the relevant website. Let’s explain step by step how to install Google Tag Manager.
1. First, create a Tag Manager account at https://tagmanager.google.com.

2. Follow the path Administrator > Install Google Tag Manager after account creation.

3. Then, add the first code to the <head> section and the second code immediately after the <body> tag of the relevant website.

4. After these steps, the Google Tag Manager account becomes active, allowing the addition of various third-party tools like Analytics, Facebook Pixel, Hotjar, etc., to the website.
Once the necessary codes are added to the relevant sections of the website, data starts to flow, enabling insights into the site’s overall performance.
Mobile Setup
Google Tag Manager is specially integrated with Firebase for mobile applications. To create an account or access an existing one, visit tagmanager.google.com.
After logging into your account, create a container for your mobile application and select the “Mobile Applications” option. Choose the container type that fits your application (Android, iOS) and specify the SDK version.
What are the Benefits of Google Tag Manager?
Google Tag Manager offers many advantages to users and simplifies the work related to websites. Thus, it’s accurate to say that many website owners have shown interest in this system lately. The benefits of Tag Manager generally include: